🌸 Introduction: Nail Stamping Made Simple
Whether you're a nail stamping pro or just starting your nail art journey, the right stamper can make or break your design. Today, we’ll explore how to choose the best nail stamper, compare types, and share expert tips for flawless stamping — featuring TRENDYMIKO, your go-to nail art brand for creative and easy-to-use tools. 💅

💎What Is a Nail Stamper?
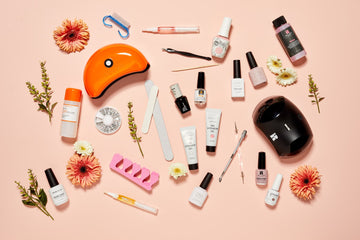
A nail stamper is a must-have tool that transfers intricate designs from stamping plates onto your nails. It’s perfect for creating detailed looks without the need for steady hands or advanced painting skills.
At TRENDYMIKO, we design stampers that make nail art fun and effortless — from clear silicone stampers for precision placement to gummy stampers for creative effects like chrome or glitter finishes.

💅 Types of Nail Stampers
1. Classic Clear Stampers
Best for: Beginners and general use
Features: Transparent silicone head for precision
Why You’ll Love It: You can see exactly where to place your design — perfect for detailed or layered looks.
2. Ice Cube Stampers
Best for: Everyday nail stamping
Features: Compact rectangular shape + clear head
Benefits: Easy grip, sturdy feel, and excellent visibility. TRENDYMIKO’s Ice Cube-style stampers are a fan favorite for their smooth pickup and crystal clarity.
3. Monocle Stampers
Best for: Wide nail beds and straight-line designs
Features: Large, flat surface
Benefits: Great for even stamping — ideal for clean patterns like stripes or plaids.
4. Double-Ended Stampers
Best for: Versatility and multitasking
Features: Two different silicone heads
Benefits: One side for small, intricate designs; the other for bold, full-nail prints.
5. Pencil-Style Stampers
Best for: Touch-ups and micro designs
Features: Dual-ended precision stamper
Benefits: Excellent for tiny nail beds or small details — just like using an art brush but with stamping accuracy.
6. Gummy Stampers
Best for: Chrome powders and glitter stamping
Features: Sticky silicone head
Benefits: Picks up fine pigments easily. A must-have for creative stamping looks — available in TRENDYMIKO’s pro-level nail art kits.
7. Shrinking Stampers
Best for: Customizing design size
Features: Flexible silicone head
Benefits: Perfect for resizing designs to fit your nail shape. Great for small nails and fine-tuning symmetry.

Pro Tips: How to Use a Nail Stamper Like a Pro
1. Prep Your Stamper
-
Clean gently with tape or a lint roller (avoid too much acetone).
-
Let it sit on paper to absorb excess oils.
2. Pick Up the Design
-
Use firm, even pressure.
-
Scrape polish at a 45° angle for clean edges.
3. Transfer and Seal
-
Apply onto a tacky base coat.
-
Seal your art with a glossy or matte top coat.
-
Want extra durability? Try TRENDYMIKO’s Nail Art Seal Gel, specially formulated for stamping designs.

❓ FAQs About Nail Stampers
Q1: Why won’t my stamper pick up the design?
Make sure it’s clean and oil-free. Use mild soap or the paper trick to restore tackiness.
Q2: Can I use regular polish for stamping?
Yes, but TRENDYMIKO stamping polishes are thicker and designed to transfer patterns more sharply.
Q3: How long can I store a reverse-stamped design?
If capped properly, up to 24 hours — ideal for prepping multiple manicures in advance.

✨ Final Thoughts
Nail stamping is more than just a technique — it’s an art form that lets you express creativity in every manicure. By finding the right nail stamper and learning how to use it properly, your designs can look salon-perfect every time.
Explore TRENDYMIKO’s Nail Tools Collection for beginner-friendly stampers, chrome powders, and pro stamping plates.
Elevate your nail art game — one beautiful design at a time. 💖