Introduction
If you’re looking to step up your nail game without spending hours in a salon or breaking the bank, press-on nails are the way to go! They’re quick, easy, and can give you a polished, salon-worthy look right at home. Whether you’re new to press-ons or just looking for a bit of guidance, this post will walk you through everything you need to know—from the basics of design to application tips and how to remove them safely.

What Are Press-on Nails?
Simply put, press-on nails are pre-designed artificial nails that you apply to your natural nails using adhesive. They come in all kinds of shapes, sizes, and designs, so you can choose something that fits your personal style. Unlike acrylics or gels, press-ons are quick and easy to apply, making them a popular option for people who want a cute manicure without the hassle or time commitment.
Design Principles of Press-on Nails
When it comes to press-on nails, the design is everything! Here are a few things to keep in mind:
-
Materials
Press-on nails are typically made from plastic, acrylic, or a blend of both. Higher-quality press-ons often use more flexible materials that bend and fit better, making them feel more comfortable and less likely to pop off unexpectedly. You’ll also find some with gel-like finishes that mimic the shiny look of salon nails. -
Shape and Length
You’ll find press-on nails in a variety of shapes, like:- Square: Classic, modern, and easy to wear for all occasions.
- Oval: Rounded and soft, perfect if you want something more natural-looking.
- Coffin: Edgy and trendy, with a tapered, coffin-like shape.
- Stiletto: Bold and dramatic, these have a sharp point at the tip.
As for length, press-ons can be short (for a more subtle look) or long (for a more striking statement).
-
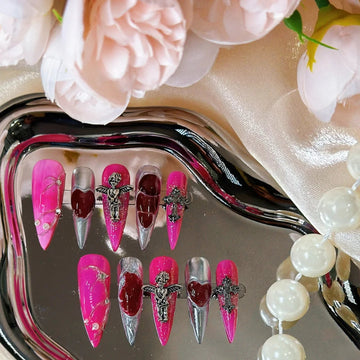
Designs
The fun part! You can find press-ons in everything from solid colors to intricate nail art. You’ll also find options with glitter, ombre, or even 3D embellishments. Some sets come pre-decorated with jewels or decals, so you don’t have to worry about any extra work. Whether you like a minimalist look or something more elaborate, there’s definitely a design for you. -
Fit and Comfort
The best press-on nails are designed to fit comfortably against your natural nails. A good fit is key to ensuring they stay in place and don’t cause any discomfort. Most brands offer a range of sizes so you can find the one that suits your nails perfectly.

How Press-on Nails Are Made
Here’s a little behind-the-scenes look at how press-on nails are created:
-
Molded to Fit
Press-on nails are molded to closely resemble the natural curve of your nail bed. Some high-end brands even allow for custom sizing, so you can pick the exact nails that match your natural shape and size. -
The Design
The nail art you see on press-on nails can be created in a number of ways. Some are hand-painted, others feature stamping or gel polish for a smooth finish. There’s no limit to creativity, from delicate floral patterns to bold, geometric designs. -
Adhesive
Press-on nails come with either adhesive tabs or glue. The adhesive is usually strong enough to keep the nails in place for several days, but it’s also easy to remove when you’re ready for a new look.
How to Apply Press-on Nails
Applying press-on nails is super easy, but prepping your natural nails is key to making sure they stay on. Here’s a step-by-step guide:
-
Prep Your Nails
Start by removing any old polish and washing your hands thoroughly. Then, gently push back your cuticles with a cuticle pusher (you can use an orange stick or a metal pusher). Buff the surface of your nails lightly with a nail file so the press-on nails will stick better. -
Size Up the Nails
Lay out your press-on nails and match each one to the corresponding finger. Make sure the nail fits from side to side without hanging over the edges. If one is too big, just file it down a bit to make it fit. -
Apply the Adhesive
There are two main options for adhesive:- Adhesive Tabs: These sticky pads are easy to use, and the nails can be removed without causing damage to your natural nails. However, they usually don’t last as long as glue.
- Nail Glue: This provides a much stronger hold, perfect if you want your press-on nails to last several days. Apply a small drop of glue to your natural nail, then press the press-on nail on top for 10-15 seconds. Be sure to get it in the right spot before the glue sets!
-
Press and Hold
After applying the adhesive, press down firmly on the press-on nail for a few seconds to make sure it sticks. Double-check to ensure the edges are secure. -
Finish Up
Once all the nails are on, take a quick look to make sure everything looks aligned and perfect. If you need to, file any edges that are sticking out to make the look more polished.

How to Remove Press-on Nails
When it’s time to take them off, there’s no need to panic. Removing press-on nails is simple, as long as you do it carefully:
-
Soak in Warm Water
If you’ve used adhesive tabs, soaking your nails in warm, soapy water for 10-15 minutes will loosen the adhesive. After soaking, gently peel the nails off, starting from the edges. -
Use Nail Polish Remover
If you’ve used glue, soaking your nails in acetone or using an acetone-based nail polish remover will help dissolve the glue. After that, gently lift the press-on nails off with a wooden stick or cuticle pusher. -
Be Gentle
Don’t force the nails off! If you feel resistance, soak your nails for a little longer. Ripping the nails off could cause damage to your natural nails. -
Aftercare
Once your press-ons are off, give your natural nails some love. Moisturize your cuticles with a nourishing oil, and keep your nails hydrated to prevent them from drying out.
Advantages of Press-on Nails
- Convenience: Applying press-on nails only takes a few minutes, so it’s perfect for those on-the-go.
- Variety: From simple to artistic designs, there’s something for everyone.
- Affordable: Press-ons are much more budget-friendly than a salon visit.
- No Damage: As long as you apply and remove them properly, press-ons won’t damage your natural nails.

Conclusion
Press-on nails are a fantastic option if you’re looking to add a bit of glam to your life without the salon price tag. They’re easy to apply, come in a wide variety of designs, and are a great way to experiment with different looks. Whether you're after something subtle or bold, press-ons are definitely worth trying!