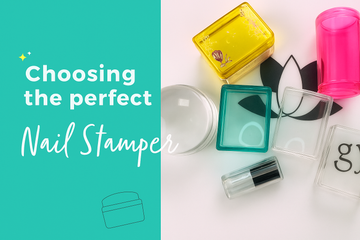
What is Magic Blooming Gel?
Have you ever been captivated by watercolor-like soft gradients, mesmerizing smoky effects, or aurora-like ombré nail art? While these effects may seem complex, they can actually be easily achieved with a single product—Magic Blooming Gel. Magic Blooming Gel is a special transparent gel designed to create a natural diffusion effect on the nail surface, allowing colors to flow and form unique gradients or textures. Unlike regular gel polish, it’s specially formulated for blooming, adding depth and artistry to your nails.

How Does Magic Blooming Gel Work?
✨ Automatic Blooming Effect: Once applied, the gel polish naturally spreads under the action of the blooming gel, forming distinct fluid textures.
✨ Easy to Use: No complex techniques required. Simply dot and watch as it creates stunning effects.
✨ Versatile Styles: From watercolor blooms and marble textures to smoky effects and dreamy ombré, this gel does it all.
✨ Compatible with Various Gel Polishes: Works well with other gels like cat eye polish, glitter gels, and more, offering endless creative possibilities.
Creative Nail Designs with Magic Blooming Gel
- Basic Watercolor Bloom: Apply a layer of Magic Blooming Gel over a base color, then dot your chosen gel color on top. The gel will naturally spread, creating a watercolor effect.
- Marble Effect: Use black, white, or gray gel to dot and blend with a fine brush for an elegant marble design.
- Smoky Effect: Combine transparent or gradient gel colors to create a dreamy, misty look.
- Multicolor Blending: Use different colors for gradient blooming, adding dimension and complexity to your nails.

How to Use Magic Blooming Gel: Step-by-Step Guide
🔹 Basic Tutorial:
- Apply your base color and cure under a UV or LED lamp.
- Apply a thin layer of Magic Blooming Gel (no curing needed yet).
- Use a dotting tool or brush to apply gel color on top of the blooming gel. Watch it naturally diffuse.
- Once you're satisfied with the look, cure under the light.
- Apply a top coat to finish the design.
🔹 Advanced Techniques:
- Softer Bloom: Use a small brush to gently blend the edges for a more subtle effect.
- Control the Blooming Area: Apply a small amount for fine textures or a larger amount for more dramatic spreading.
- Layered Bloom: Apply one layer, cure, then repeat the process to create rich layers of bloom.
Popular Color Pairing Recommendations
🌸 Soft & Gentle: Nude pink + white blooming (perfect for daily office wear)
🌌 Dreamy & Magical: Blue-purple gradient + starry details (ideal for ethereal nail art)
🖤 Bold & Edgy: Black and white smoky effect (great for a trendy, cool vibe)
💎 Elegant & Luxurious: Gold + marble texture (perfect for parties or elegant events)

Where to Wear & How to Style
- Daily Commute: Soft nude shades with light blooming for a simple yet sophisticated look.
- Dates & Parties: Dreamy gradients with glitter accents for a feminine and playful touch.
- Artistic Flair: Bold blooming with unique color combinations to showcase your creativity.
Why Choose TRENDYMIKO Magic Blooming Gel?

With many blooming gels available, TRENDYMIKO stands out due to the following features:
✅ Superior Blooming Effect: Even spreading, with full control over the bloom range.
✅ Beginner-Friendly: No professional skills needed, making it easy to achieve salon-quality nails.
✅ Safe & Eco-Friendly: Low odor, gentle formula that’s safe for your nails.
✅ Highly Compatible: Works seamlessly with various nail products, allowing endless design possibilities.
Whether you're a nail art enthusiast or a professional nail artist, TRENDYMIKO Magic Blooming Gel helps you easily achieve dreamy, professional-looking nail art. Try it today and let your nails shine with magical beauty! 💅✨