Introduction
Many people enjoy DIY manicures, but sometimes, gel nails need to be removed, especially when they start to lift or cause discomfort. Even if you can't go to a salon, you can still remove gel nails at home easily. Today, we’ll share how to remove gel nails on your own, including the necessary tools and steps to keep your nails looking perfect.

How to Extend the Life of Your Gel Nails
Gel nails can get damaged due to daily activities. Here are some habits that can shorten their lifespan:
- Using fingertips for typing or tasks: This can cause the gel to chip or lift at the tips.
- Long exposure to chemicals or water: Regular contact with water or chemicals can speed up the peeling of gel nails.
- Peeling off gel nails: Habitually picking at your nails can damage the gel and even harm your natural nails.
Tips for Keeping Gel Nails in Good Condition at Home
Even at home, there are ways to maintain your gel nails for a longer time:
- Trim Regularly: If your gel nails are too long, use a nail clipper to trim them to a suitable length.
- Use a Nail File: If the edges of your gel nails start lifting, gently file them down with a nail file.
- Avoid Using Fingertips: Try to use your finger pads for tasks instead of your fingertips to reduce pressure on the gel nails.
- Wear Gloves: When doing chores or working with chemicals, wear gloves to protect your nails.
- Daily Care: Apply cuticle oil and hand cream every morning and evening to keep your hands and nails hydrated.

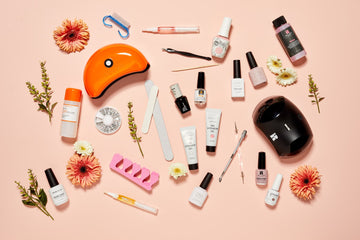
Tools You Need for DIY Nail Removal
When you can't go to a salon, having the right tools at home will make the process easier. Here’s a list of the necessary tools and their functions:
| Tool | Function |
|---|---|
| Dual-sided Nail File (180/180) | Used to remove the gel surface and top coat |
| Nail Remover Liquid | Special remover for gel nails, to be used with cotton pads |
| Cotton Pads & Clips | Cotton pads soaked in remover liquid, secured with clips on nails |
| Cuticle Pusher or Nail Scraper | Used to gently push off softened gel from the nail surface |
| Nail Buffer | Used to smooth out the nail surface and remove any remaining gel |
| Cuticle Oil | Applied to nourish the cuticles around your nails |
| Hardener Polish | Applied to strengthen the nails after removal |

5 Steps for DIY Nail Removal
Once you have all the necessary tools, follow these steps to remove your gel nails at home:
Step 1: File the Gel Surface
Use a dual-sided nail file (180/180) to remove the gel's top coat, continuing until the gel surface starts showing small holes.
Step 2: Apply Nail Remover
Soak a cotton pad with nail remover liquid and apply it to the nail surface. Secure the cotton with a clip and wait 5-10 minutes for the gel to soften or lift.
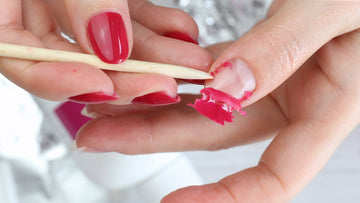
Step 3: Scrape Off the Gel
Use a cuticle pusher or nail scraper to gently scrape off the gel that has lifted from the nail.
Step 4: Buff the Nail Surface
If any gel remains on the nail, use a nail buffer to gently buff away the residue and smooth the surface.
Step 5: Nail Care
After the gel is removed, apply hardener polish to strengthen the nails. If your cuticles are dry, apply cuticle oil to keep the area hydrated.

What to Do if You Don’t Have Professional Tools
Even without professional tools, you can still remove gel nails at home. Here’s how:
- File the Gel Surface: Use a nail file to remove the gel until you see small holes in the surface.
- Soak in Remover: Pour nail remover liquid into a small bag, and soak your nails in it for 5-10 minutes.
- Scrape Off the Gel: Use a nail scraper or cuticle pusher to gently remove the lifted gel.
- Buff the Nails: Use a nail buffer to smooth out the nail surface and remove any leftover gel.
Effortless Removal Option
If you’re looking for an even easier way to remove gel polish, a quick-burst nail polish remover can save you time. Instead of soaking your nails for 10 minutes, this type of remover works within two minutes, breaking down the gel for effortless removal. It’s a great option when you're short on time or want a more convenient process. Just apply, wait a little, and gently wipe away the softened polish—your nails will be fresh and ready for their next look in no time!

Conclusion
DIY nail removal at home is simple and effective with the right tools and steps. By following the process carefully and maintaining proper nail care, you can keep your nails healthy and beautiful, even without visiting a salon.