Introduction
Gel nail manicures are a game-changer for achieving long-lasting, glossy nails. But what if your gel polish isn't curing properly? Whether you're a beginner or an experienced nail enthusiast, dealing with under-cured, wrinkled, or bubbled gel can be frustrating. In this guide, we’ll break down why your gel polish isn’t curing and how to fix it!

How Long Should Gel Polish Take to Cure?
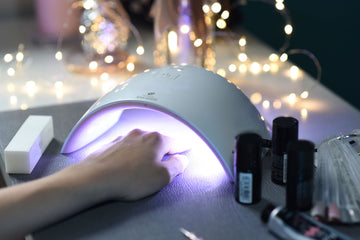
The curing time for gel polish depends on the type and wattage of your nail lamp. Understanding these differences ensures your gel fully hardens without issues.
| Nail Lamp Type | Wattage | Curing Time | Best For |
|---|---|---|---|
| Small Portable Lamp | 6-12W | 4-6 minutes | DIY beginners, travel-friendly |
| Professional Lamp | 36-48W | 30-60 seconds | Nail salons, professionals, and quicker results |
A small lamp is convenient for beginners but takes longer to cure. Higher-wattage lamps cure polish much faster but are bulkier to store.

6 Common Reasons Your Gel Polish Isn’t Curing
If your nails stay tacky after curing, one of these reasons might be the culprit:
1️⃣ Applying Too Much Gel
Overloading your nails with gel creates a thick layer that light can’t penetrate properly, leading to under-cured or wrinkled polish. Solution? Apply thin, even layers and cure each one separately.
2️⃣ Shortening Cure Time
Trying to speed up the process by reducing curing time? Bad idea! Stick to the recommended 30-60 seconds (for high-wattage lamps) or 4-6 minutes (for smaller lamps) to avoid soft, peeling polish.
3️⃣ Incorrect Hand Placement
If your hand is not centered under the lamp, some areas may not receive enough light exposure. Always place your fingers flat in the middle of the lamp for even curing.
4️⃣ Skipping Essential Layers
Base coat and top coat are essential for a strong, durable manicure. Skipping them can result in weak adhesion and peeling. Always use a base coat to prevent staining and a top coat to seal and protect your manicure.
5️⃣ Using a Low-Wattage Lamp Incorrectly
If you’re using a 6-12W lamp, you must extend the curing time. Less powerful lamps take longer to fully cure each layer, so patience is key!
6️⃣ Using the Wrong Lamp for Your Gel Brand
Different gel brands have different curing requirements. Some work better with UV lamps, while others are designed for LED lamps. Always check the manufacturer’s recommendations.

Why Does My Gel Polish Wrinkle After Curing?
Wrinkled gel is a common issue, usually caused by: 🔸 Applying thick layers that don’t cure properly 🔸 Not curing for long enough 🔸 Aged or weak lamp bulbs that don’t provide sufficient light
To fix this, apply thinner layers and cure them fully before adding another coat.
Why Are There Bubbles or Granules in My Gel Polish?
Bubbles or grainy textures can ruin the smooth look of gel polish. These are often caused by: 🔹 Applying gel too slowly, allowing air to mix in 🔹 Over-mixing the gel bottle before application 🔹 Not cleaning your brush properly before use
For a smooth application, stir the gel gently (don’t shake), apply with a steady hand, and ensure your brush is clean.

How to Fix Gel Polish That Won’t Cure
If your gel polish isn’t curing properly, follow this checklist: ✅ Double-check your curing process – Ensure all steps are followed correctly. ✅ Confirm your lamp’s wattage – If it’s low-powered, increase curing time. ✅ Check if your lamp needs replacing – Over time, LED/UV bulbs lose their effectiveness. ✅ Determine if you need to wipe off the tacky layer – Some top coats require an alcohol wipe after curing. ✅ Verify lamp compatibility with your gel brand – Not all gels cure the same way under different lamps.
By understanding these common mistakes and solutions, you can achieve perfectly cured, long-lasting gel nails every time! 💖💅